Waypoints
The Waypoints extension gives full capabilities to manage waypoints and task routes. Waypoints and routes are extensively used in competitions, and Flyskyhy has full support for that. But also for the casual flyer it can be an enhancement to your flights, to define a couple of waypoints and try to reach those during the flight. Especially when flying with friends, who all try to reach the same waypoints. Who can reach the most ones?
Flyskyhy has support for both types of uses.
Flyskyhy has support for both types of uses.
Waypoints on Map
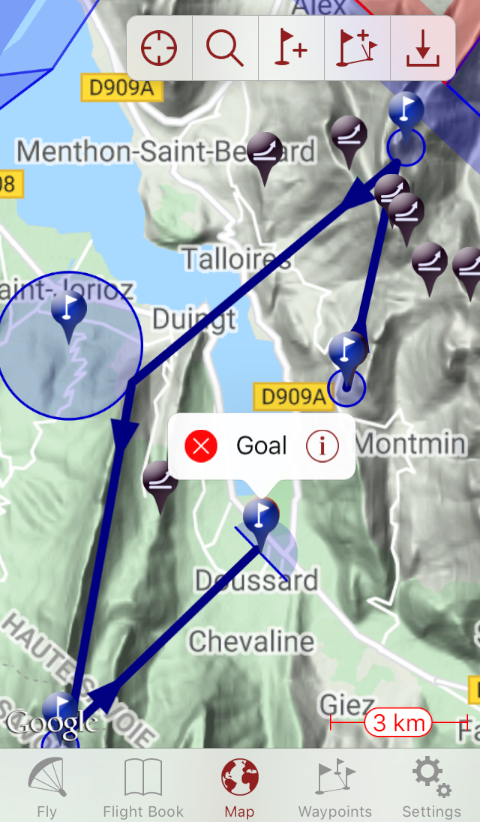
With the Waypoints Extensions, the waypoint route as well as all waypoints are shown on the planning map. Each waypoint is shown with a little flag and a blue circle. The circle represents the radius of the cylinder that surrounds the point. Waypoints come in two flavours: entry or exit. An entry point is reached when you enter the cylinder, and for exit points you need to exit the cylinder. This can be set explicitly for each waypoint, but the app can also automatically determine it for you, depending on the shape of the route.
To select a waypoint, tap on its flag. A popup comes up with its name, a delete button, and an edit button. Selected waypoints can easily be moved by simply dragging the flag to another spot.
To add a new waypoint to the map, tap the![[add waypoint]](/uploads/WaypointAddIcon.png) icon at the top. The new point will be added in the center of the map, and can subsequently be moved to its correct spot. Its name and other parameters can be changed through the edit button.
icon at the top. The new point will be added in the center of the map, and can subsequently be moved to its correct spot. Its name and other parameters can be changed through the edit button.
The![[edit route]](/uploads/EditRouteIcon.png) icon enables the easy creation and extension of a route between the existing waypoints. Tap it to enable route editing, tap it again when done. A new route is started by dragging from the flag of the start waypoint to the flag of the next one. To extend an existing route, drag from the end of the existing route to the next waypoint flag.
icon enables the easy creation and extension of a route between the existing waypoints. Tap it to enable route editing, tap it again when done. A new route is started by dragging from the flag of the start waypoint to the flag of the next one. To extend an existing route, drag from the end of the existing route to the next waypoint flag.
To select a waypoint, tap on its flag. A popup comes up with its name, a delete button, and an edit button. Selected waypoints can easily be moved by simply dragging the flag to another spot.
To add a new waypoint to the map, tap the
The
Waypoint Lists
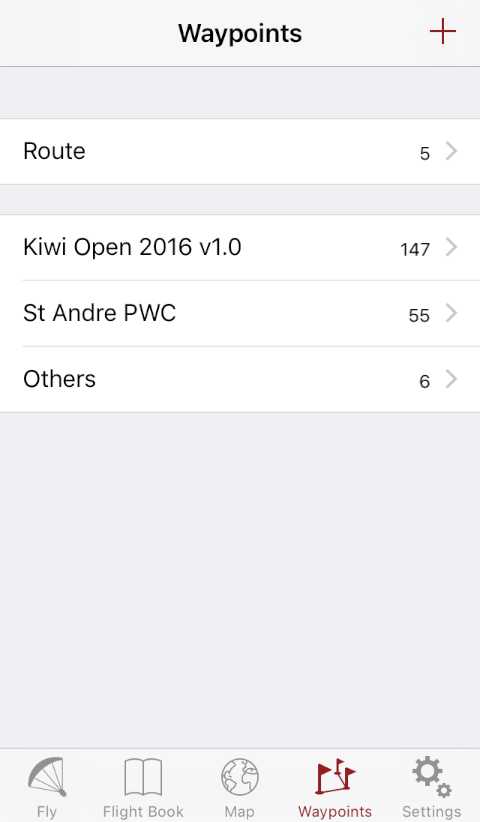
The map can be handy to get an overview of the waypoints and the route, but often you will need better control. The 'Waypoints' tab shows the Waypoints organiser. You can organise your waypoints into separate lists, which show up on this page.
New lists can be added through the '+' in the top right. Swiping left on an existing list gives the choice of renaming or deleting the list. The lists can also be reordered by dragging them around. You will need to hold the list for an instant before starting to drag it.
The active route is a special list that is always shown on top.
You can view and edit the waypoints in each list by tapping on the right. This will open the waypoint edit page.
Waypoints Edit
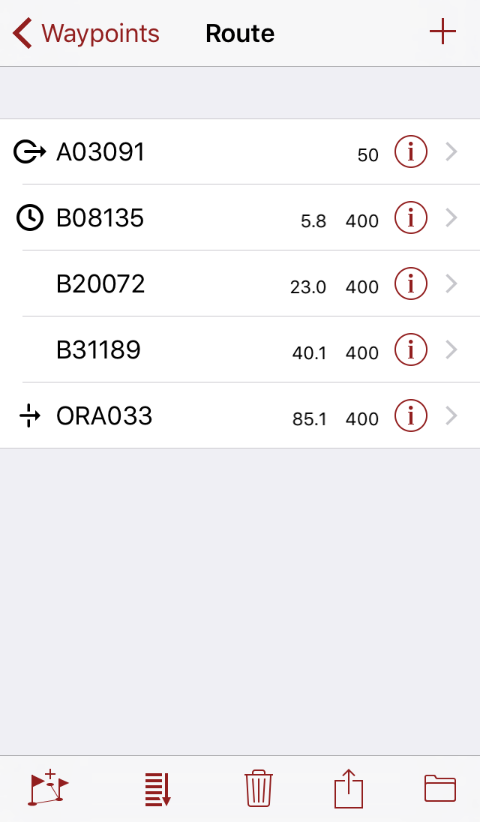
In the Waypoints Edit page, all waypoints in a specific list are shown (here in the Route). It shows some basic information for each waypoint: its name and radius, whether it is an entry, exit, or line waypoint, whether it is optional, and whether a start time is associated with it. The radius is by default shown in meters, but that can be changed in Settings→Others→Units. For the Route, also the cumulative optimal distance along the route is shown for each waypoint.
Individual waypoints can be added, deleted and moved around in the same way as for the lists. Tapping on the right of a waypoint opens the details editor.
A single tap on a waypoint will select it, and multiple waypoints can be selected at the same time. The actions on the bottom bar will act on the selected waypoints. If no waypoints are selected, then all of them will be used.
| This will copy the selected waypoints to the end of the route. | |
| Sort all waypoints in the list. You can sort alphabetically, based on distance from your current location, or closest to end-point of the route | |
| Delete the selected waypoints. | |
| Export the selected waypoints by QR code, email, or share them in other ways your phone allows. When pressed, you will get a screen with QR code which can be used directly. It also offers a way to select the file format for the file to export in other ways. | |
| Move the selected waypoints to another waypoint list. |
Edit Waypoint Details
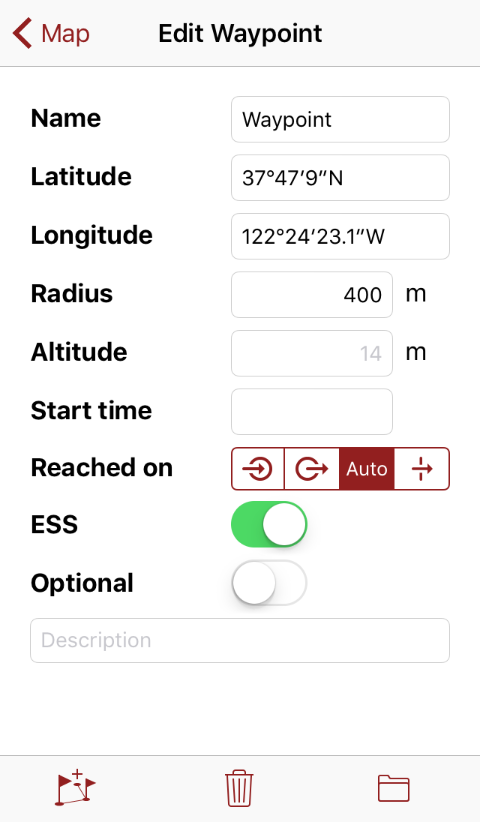
All details of a waypoint can be changed. Of course you can change its name, location, and radius. But waypoints also have an altitude. The altitude is used in instruments that calculate whether a waypoint is reachable. If you leave the altitude empty, then ground elevation at the waypoint's center will be used.
Waypoints are normally cylinders with a given radius around a geographic location. You can change whether the waypoint is reached on entry or on exit, determined by the "Reached on" setting. To reach an entry waypoint, you will need to fly from outside its radius to inside. It is not enough to be inside the waypoint already when the flight begins. In that case, you will need to fly out of the waypoint first, and then return back into it again. Exit waypoints are reached when you fly from inside the waypoint to outside.
When set to "Auto", the app will determine automatically whether the waypoint is entry or exit, based on the shape of the route.
Instead of a cylinder, the waypoint can also represent a line. The line will always be orthogonal to the direction to the center of the preceeding waypoint, and extends the "Radius" distance to each side of the location. A line is reached when it is crossed in the forward direction.
When a start time is set, then the waypoint cannot be reached before that time. You can install an instrument on the main screen that counts down to the start time.
A waypoint can be declared as End of Speed Section (ESS). In that case, the optimised route will lead straight to the waypoint over the shortest distance, without taking any subsequent waypoints into account.
An optional waypoint works in exactly the same way as a normal one. The only difference is, that it is not part of the official route declaration in the IGC log. With that, you can define an official route that you intend to fly, and which is declared in the log. Then you can add optional waypoints to help you navigate the route, avoid airspaces, etc. But you can skip the optional waypoints during flight, without invalidating the declared route. The optional waypoints are shown as dotted circles on the map.
In the Edit Waypoint you can even add a small description to remind you what is special about this one.
Loading Waypoint Files
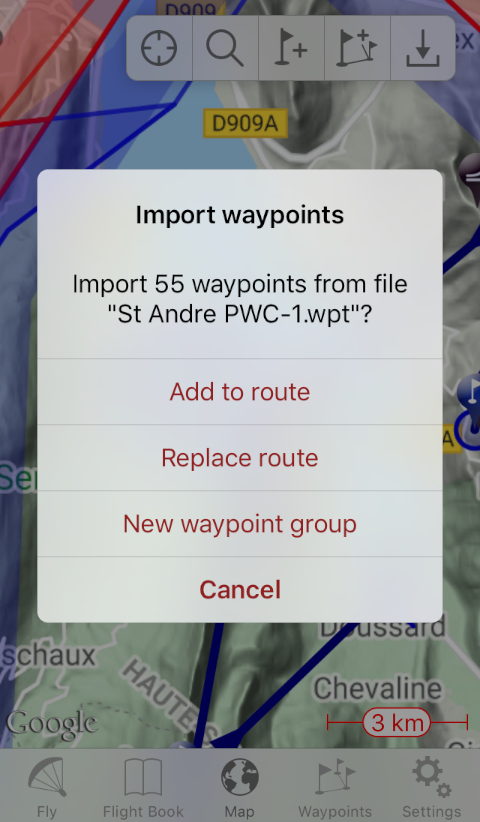
In cross country contests, each day features a task route that the participants need to fly. The waypoints in this route are usually not given individually for each day. Instead, a long list of waypoints is distributed at the beginning of the contest, and then each day a number of points are selected from that list to compose the route.
Flyskyhy makes it very easy to load such a waypoint list. If you receive the list as attachment to an email, or have the file on your phone in another way, simply tap on the file and select "Open in Flyskyhy". If you have the file on your computer, you can upload it to Flyskyhy through iTunes. Drag the file to the screen in iTunes where the Flyskyhy flight log files are visible. Make sure you have the app open while you do the latter.
The file will be loaded as a separate waypoint list. The following file formats are supported by Flyskyhy:
- (.wpt) OziExplorer
- (.wpt) CompeGPS
- (.wpt) GPSDump GEO
- (.gpx) GPX
- (.xctsk) XCTrack
Sharing through QR Code
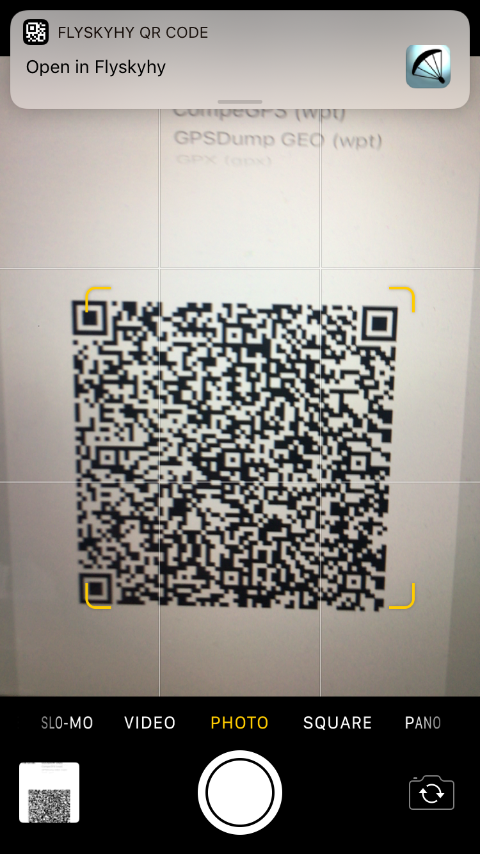
An easy way to share tasks directly from phone to phone, is through QR code. To achieve that, press the ![[export]](/uploads/exportIcon.png) icon on the Waypoints Edit page. This will directly open a screen with the QR code visible. The same screen also gives the possibility to export the waypoints in other ways.
icon on the Waypoints Edit page. This will directly open a screen with the QR code visible. The same screen also gives the possibility to export the waypoints in other ways.
To import the waypoints in another iPhone, point its Camera app to the QR code. It should recognize the QR code automatically and pop up a request to open it in Flyskyhy. Tapping that will open Flyskyhy and give the possibility to add them to the route, replace the route altogether, or create a new waypoint group.
The QR code format used is compatible with XCTrack on Android, which enables exchange of tasks with Android devices in an easy way.
During Flight
During a flight, Flyskyhy keeps you updated on your progress. The waypoints and the route are shown on the map. In Settings→Maps→Show waypoints, you can choose which waypoints to show during flight. When you reach the next waypoint on the route, its normally blue circle will turn grey, and a victory sound is played.
There are also various instruments related to waypoints that can be added to the fly screen. Examples are "Next route point", which shows the direction and distance to the next waypoint on the route (or to the nearest waypoint if no route is specified) and "Glide to goal" which shows what glide ratio you need to reach the route endpoint.
There are also various instruments related to waypoints that can be added to the fly screen. Examples are "Next route point", which shows the direction and distance to the next waypoint on the route (or to the nearest waypoint if no route is specified) and "Glide to goal" which shows what glide ratio you need to reach the route endpoint.
Multiple Routes?
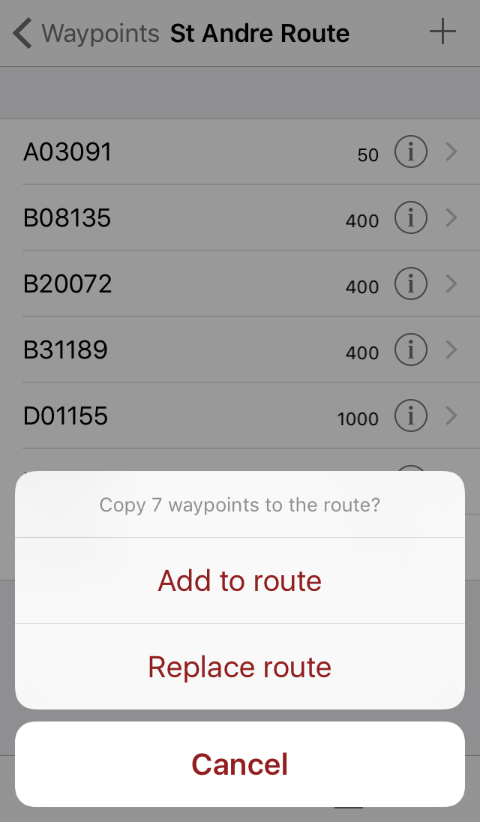
To achieve simple setup and handling of the route, Flyskyhy has only direct support for a single route. However, sometimes it is useful to keep multiple routes, and choose the one you want to fly with. Luckily, this is easy to achieve by using separate Waypoint Lists.
Set up your first route as you would normally do. Then press the![[organise]](/uploads/organiserIcon.png) icon, and select "New" to move the waypoints to a new list. Go back to the Waypoint Lists screen, and rename the new list if you want, by swiping left on it. Set up your other route(s) in a similar way.
icon, and select "New" to move the waypoints to a new list. Go back to the Waypoint Lists screen, and rename the new list if you want, by swiping left on it. Set up your other route(s) in a similar way.
After you have set up multiple routes like this, you can easily switch between routes. Simply navigate to one of the prepared waypoint lists, press the![[route]](/uploads/addToRouteIcon.png) icon, and then "Replace route". That will copy all the waypoints in the list onto the route.
icon, and then "Replace route". That will copy all the waypoints in the list onto the route.
Set up your first route as you would normally do. Then press the
After you have set up multiple routes like this, you can easily switch between routes. Simply navigate to one of the prepared waypoint lists, press the